728x90
반응형

1. gradle을 사용하면 bulid.gradle에 먼저 implementation 해줘야하는게 있다.
반드시 추가 한 후, 다시 Refresh gradle Project를 시켜주자.
implementation 'org.springframework:spring-web'
implementation("org.springframework.boot:spring-boot-starter-websocket")
2. 먼저 HTML을 만들어준다.
나는 index.html을 만들어 아래 코드를 이렇게 넣어주었다.
1 2 3 4 5 6 7 8 9 10 11 12 13 14 15 16 17 18 19 20 21 22 23 24 25 26 27 28 29 30 31 32 33 34 35 36 37 38 39 40 41 42 43 44 45 46 47 48 49 50 51 52 53 | <!DOCTYPE html> <html> <head> <title>WebSocket</title> <script src="https://code.jquery.com/jquery-3.5.1.min.js"></script> <script src="https://cdnjs.cloudflare.com/ajax/libs/sockjs-client/1.4.0/sockjs.min.js"></script> <script src="https://cdnjs.cloudflare.com/ajax/libs/stomp.js/2.3.3/stomp.min.js"></script> <script type="text/javascript" src="/js/app.js"></script> <!-- <script src="/js/app.js"></script> --> </head> <body> <!-- noscript: 브라우저가 js를 지원하지 않는 경우 뜨는 문구 --> <noscript><h2 style="color: #ff0000">Seems your browser doesn't support Javascript! Websocket relies on Javascript being enabled. Please enable Javascript and reload this page!</h2></noscript> <div id="main-content" class="container"> <div class="row"> <div class="col-md-6"> <form class="form-inline"> <div class="form-group"> <label for="connect">채팅방</label> <button id="connect" class="btn btn-default" type="submit">입장하기</button> <button id="disconnect" class="btn btn-default" type="submit" disabled="disabled">퇴장하기 </button> </div> </form> </div> <div class="col-md-6"> <form class="form-inline"> <div class="form-group"> <label for="name">메세지 입력</label> <input type="text" id="name" class="form-control" placeholder="메세지를 입력하세요."> </div> <button id="send" class="btn btn-default" type="submit">보내기</button> </form> </div> </div> <div class="row"> <div class="col-md-12"> <table id="conversation" class="table table-striped"> <thead> <tr> <th>내용</th> </tr> </thead> <tbody id="greetings"> </tbody> </table> </div> </div> </div> </body> </html> | cs |
3. HTML과 연동시킬 javascript를 만들어준다.
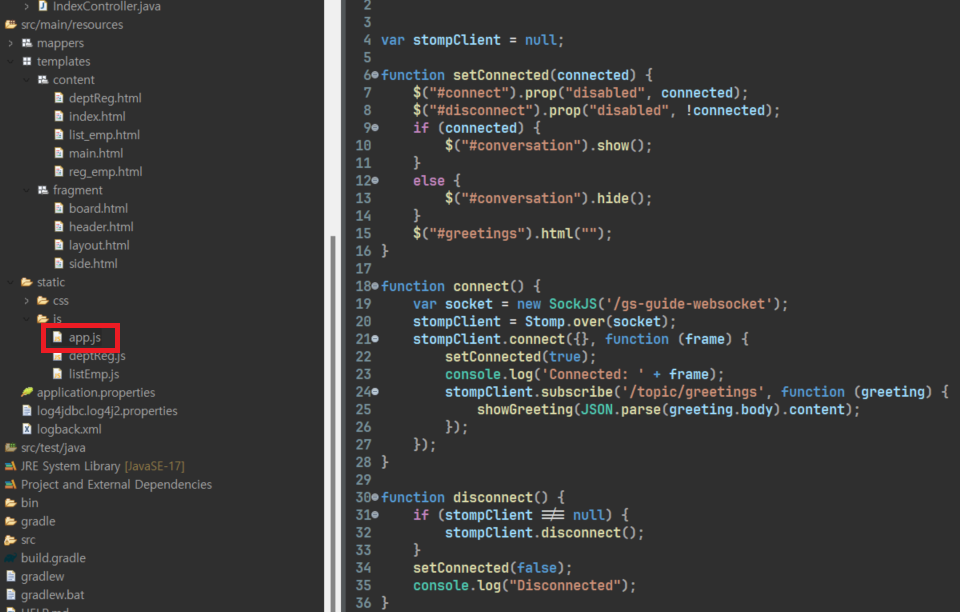
아래 코드를 app.js를 만들고 붙여넣어 주었다.
1 2 3 4 5 6 7 8 9 10 11 12 13 14 15 16 17 18 19 20 21 22 23 24 25 26 27 28 29 30 31 32 33 34 35 36 37 38 39 40 41 42 43 44 45 46 47 48 49 50 | var stompClient = null; function setConnected(connected) { $("#connect").prop("disabled", connected); $("#disconnect").prop("disabled", !connected); if (connected) { $("#conversation").show(); } else { $("#conversation").hide(); } $("#greetings").html(""); } function connect() { var socket = new SockJS('/gs-guide-websocket'); stompClient = Stomp.over(socket); stompClient.connect({}, function (frame) { setConnected(true); console.log('Connected: ' + frame); stompClient.subscribe('/topic/greetings', function (greeting) { showGreeting(JSON.parse(greeting.body).content); }); }); } function disconnect() { if (stompClient !== null) { stompClient.disconnect(); } setConnected(false); console.log("Disconnected"); } function sendName() { stompClient.send("/app/hello", {}, JSON.stringify({'name': $("#name").val()})); } function showGreeting(message) { $("#greetings").append("<tr><td>" + message + "</td></tr>"); } $(function () { $("form").on('submit', function (e) { e.preventDefault(); }); $( "#connect" ).click(function() { connect(); }); $( "#disconnect" ).click(function() { disconnect(); }); $( "#send" ).click(function() { sendName(); }); }); | cs |
4. 이번 기능의 핵심인 STOMP를 만들어 준다.
GreetingVO, HelloMesaageVO, Config로 WebSocket을 생성해주었다.
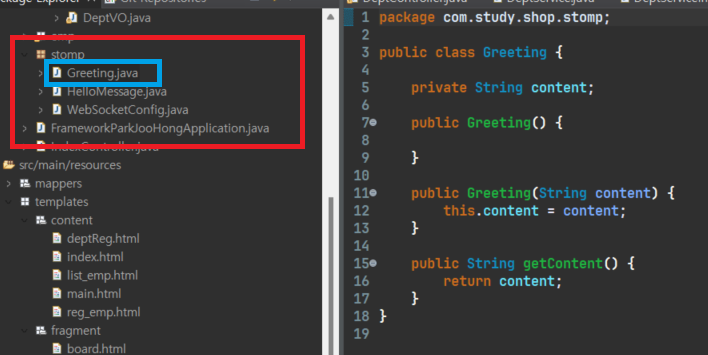
Greeting.java
1 2 3 4 5 6 7 8 9 10 11 12 13 14 15 16 17 18 | package com.study.shop.stomp; public class Greeting { private String content; public Greeting() { } public Greeting(String content) { this.content = content; } public String getContent() { return content; } } | cs |
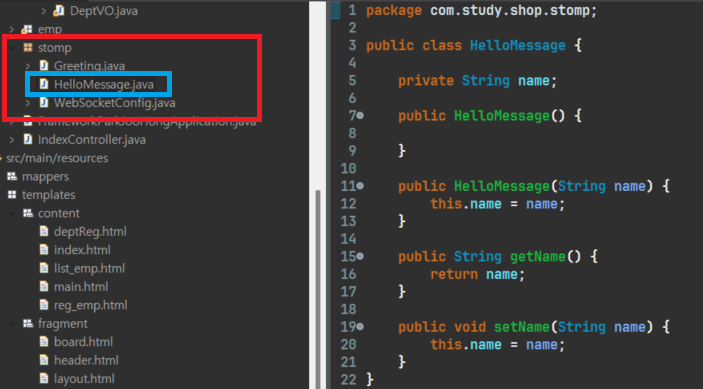
HelloMessage.java
1 2 3 4 5 6 7 8 9 10 11 12 13 14 15 16 17 18 19 20 21 22 | package com.study.shop.stomp; public class HelloMessage { private String name; public HelloMessage() { } public HelloMessage(String name) { this.name = name; } public String getName() { return name; } public void setName(String name) { this.name = name; } } | cs |
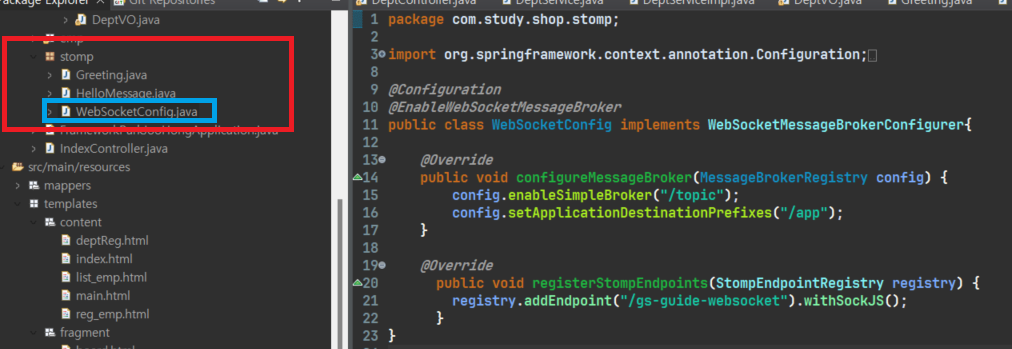
WebsocketConfig.java
1 2 3 4 5 6 7 8 9 10 11 12 13 14 15 16 17 18 19 20 21 22 23 | package com.study.shop.stomp; import org.springframework.context.annotation.Configuration; import org.springframework.messaging.simp.config.MessageBrokerRegistry; import org.springframework.web.socket.config.annotation.EnableWebSocketMessageBroker; import org.springframework.web.socket.config.annotation.StompEndpointRegistry; import org.springframework.web.socket.config.annotation.WebSocketMessageBrokerConfigurer; @Configuration @EnableWebSocketMessageBroker public class WebSocketConfig implements WebSocketMessageBrokerConfigurer{ @Override public void configureMessageBroker(MessageBrokerRegistry config) { config.enableSimpleBroker("/topic"); config.setApplicationDestinationPrefixes("/app"); } @Override public void registerStompEndpoints(StompEndpointRegistry registry) { registry.addEndpoint("/gs-guide-websocket").withSockJS(); } } | cs |
5. 소켓 통신을 받을 SenTo와 MessageMapping을 컨트롤러에서 해주면 js에서 통신이된다.
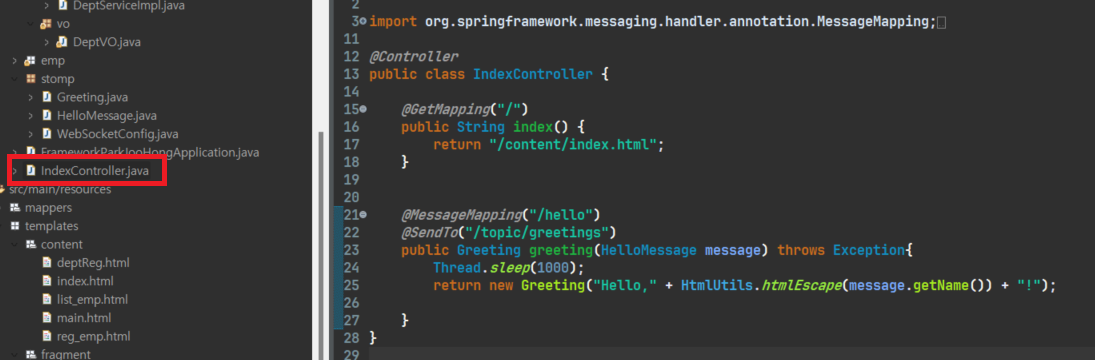
나는 indexController에서 페이지와 소켓 통신 둘다 해주었다.
IndexController.java
1 2 3 4 5 6 7 8 9 10 11 12 13 14 15 16 17 18 19 20 21 22 23 24 25 26 27 28 | package com.study.shop; import org.springframework.messaging.handler.annotation.MessageMapping; import org.springframework.messaging.handler.annotation.SendTo; import org.springframework.stereotype.Controller; import org.springframework.web.bind.annotation.GetMapping; import org.springframework.web.util.HtmlUtils; import com.study.shop.stomp.Greeting; import com.study.shop.stomp.HelloMessage; @Controller public class IndexController { @GetMapping("/") public String index() { return "/content/index.html"; } @MessageMapping("/hello") @SendTo("/topic/greetings") public Greeting greeting(HelloMessage message) throws Exception{ Thread.sleep(1000); return new Greeting("Hello," + HtmlUtils.htmlEscape(message.getName()) + "!"); } } | cs |

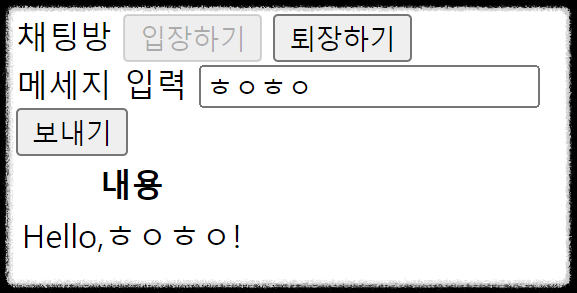
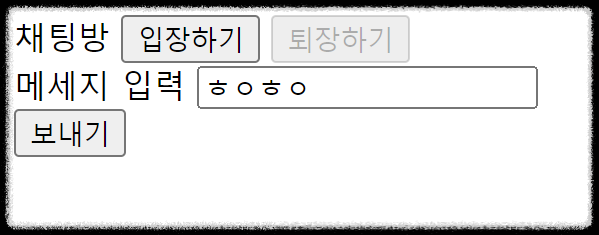
입장하기를 누르고, 메시지 입력에 텍스트를 입력후 보내기를 누르면 아래와 같이 실시간 채팅이 활성화된다.
이후 퇴장하기를 누르면 소켓이 종료되면서 채팅이 끝난다.
728x90
반응형
'✨ Back-end > Spring-Boot' 카테고리의 다른 글
| [Spring] 스프링 프레임워크(POJO, PSA, IoC/DI, AOP) 개념 (0) | 2023.08.22 |
|---|---|
| [Spring] Bean과 Bean Factory , @Configuration과 @Bean (2) | 2023.08.19 |
| [Spring] 쇼핑몰 - 62 이메일 전송하기 (1) | 2023.05.04 |
| [Spring] 쇼핑몰 - 60 주문 상태 변경 버튼 클릭시 (0) | 2023.05.02 |
| [Spring] 쇼핑몰 - 59 페이징처리 (0) | 2023.04.28 |


댓글