시작 전 보드게시판 메인페이지 board_list 레이아웃 간략 설명
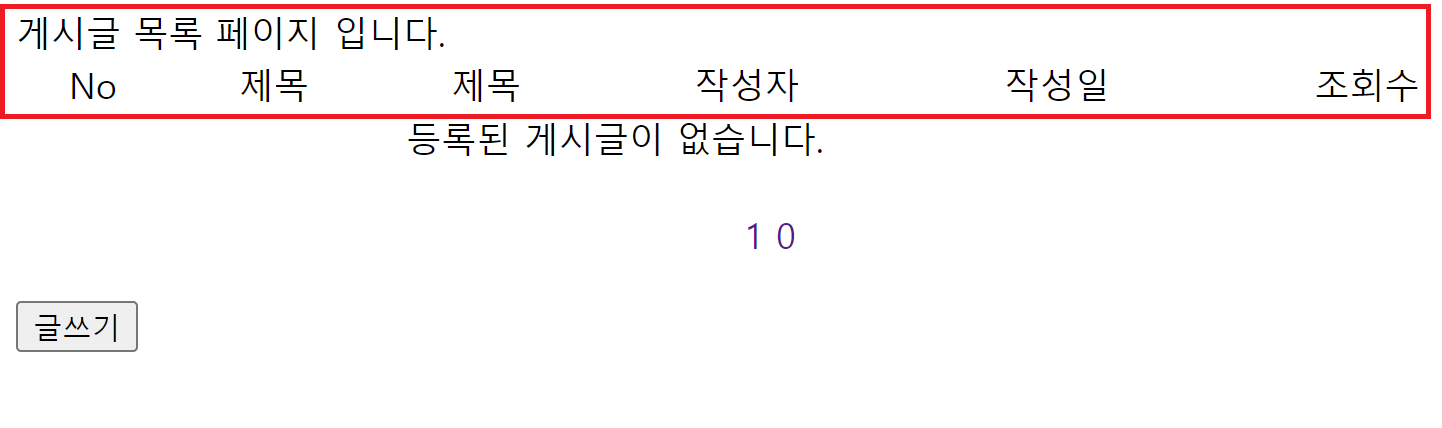
board_list.html 화면

board_list.html 코드
1 2 3 4 5 6 7 8 9 10 11 12 13 14 15 16 17 18 19 20 21 22 23 24 25 26 27 28 29 30 31 32 33 34 35 36 37 38 39 40 41 42 43 44 45 46 47 48 49 50 51 52 53 54 55 56 57 58 59 60 61 62 63 64 65 66 67 68 69 70 71 72 73 74 75 76 77 78 79 80 81 82 83 84 85 86 87 | <!DOCTYPE html> <html xmlns:th="http://www.thymeleaf.org" xmlns:layout="http://www.ultraq.net.nz/thymeleaf/layout" layout:decorate="~{fragment/layout}"> <!-- 연결해야할 외부 css파일 --> <th:block layout:fragment="content_css"> <link rel="stylesheet" href="/css/board_list.css"> </th:block> <th:block layout:fragment="content"> <div class="boardListContainer"> <div>게시글 목록 페이지 입니다.</div> <div> <table class="boardListTable"> <thead> <tr> <td>No</td> <td>제목</td> <td>제목</td> <td>작성자</td> <td>작성일</td> <td>조회수</td> </tr> </thead> <tbody> <th:block th:if="${#lists.size(list) == 0}"> <td colspan="5">등록된 게시글이 없습니다.</td> </th:block> <th:block th:unless="${#lists.size(list) == 0}"> <tr th:each="board, state : ${list}"> <td><span th:text="${board.rowNumber}"></td> <!-- 오름차순 하고 싶으면 , [[${state.count}]]--> <!-- 내림차순 하고 싶으면, <span th:text="${#lists.size(list) - state.index}"> --> <td> <th:block th:if="${board.isPrivate=='Y'}"> <img alt="" src="/img/lock.png" width="10px"> </th:block> <!-- <span th:text="${board.boardTitle + '[' + board.replyCnt + ']'}"></span> --> <span th:text="${board.boardTitle}"></span> <span th:text="${board.replyCnt == 0 ? '' : '[' + board.replyCnt + ']'}"></span> </td> <td> <th:blcok th:if="${board.isPrivate=='Y'}"> <a th:href="@{/board/checkPw(boardNum=${board.boardNum})}"> <span th:text="${board.boardTitle}"></span> </a> </th:blcok> <th:blcok th:if="${board.isPrivate=='N'}"> <a th:href="@{/board/boardDetail(boardNum=${board.boardNum})}"> <span th:text="${board.boardTitle}"></span> </a> </th:blcok> </td> <td>[[${board.boardWriter}]]</td> <td>[[${board.regDate}]]</td> <td>[[${board.readCnt}]]</td> </tr> </th:block> </tbody> </table> <div style="text-align: center; margin-top: 20px; margin-bottom: 20px"> <!-- <span th:if="${pageVO.prev}" th:text="이전"></span> 일케 써도댐.--> <th:block th:if="${pageVO.prev}"> <a th:href="@{/board/list(nowPage=${pageVO.beginPage - 1})}">이전 </a> </th:block> <th:block th:each="pageNum : ${#numbers.sequence(pageVO.beginPage, pageVO.endPage)}"> <a th:href="@{/board/list(nowPage=${pageNum})}"><span th:text="${pageNum}"> </span></a> </th:block> <th:block th:if="${pageVO.next}"> <a th:href="@{/board/list(nowPage=${pageVO.endPage + 1})}">다음 </a> </th:block> </div> <input type="button" value="글쓰기" th:onclick="|location.href='@{/board/regBoard}';|"> </div> </div> </th:block> <!-- 연결해야할 외부 js파일 --> <th:block layout:fragment="content_js"> <!-- 여기선 연결하지 않음. --> <!-- <script type="text/javascript" src="/"></script> --> </th:block> </html> | cs |


board_list.html
<th:block layout:fragment="content">
<div class="boardListContainer">
	<div>게시글 목록 페이지 입니다.</div>
	<div>
	<table class="boardListTable">
		<thead>
			<tr>
				<td>No</td>
				<td>제목</td>
				<td>제목</td>
				<td>작성자</td>
				<td>작성일</td>
				<td>조회수</td>
			</tr>
		</thead>
<th:block layout:fragment="content"> 에 의해 layout.html의 content 내용으로 열리게된다.

		<tbody>
		<th:block th:if="${#lists.size(list) == 0}">
			<td colspan="5">등록된 게시글이 없습니다.</td>
		</th:block>
		<th:block th:unless="${#lists.size(list) == 0}">
			<tr th:each="board, state : ${list}">
				<td><span th:text="${board.rowNumber}"></td>
				<!-- 오름차순 하고 싶으면 ,
				 [[${state.count}]]-->
				 <!-- 내림차순 하고 싶으면,
				 <span th:text="${#lists.size(list) - state.index}">  -->
				<td>
					<th:block th:if="${board.isPrivate=='Y'}">
						<img alt="" src="/img/lock.png" width="10px">
					</th:block>
					<!-- <span th:text="${board.boardTitle + '[' + board.replyCnt + ']'}"></span> -->
					<span th:text="${board.boardTitle}"></span>
					<span th:text="${board.replyCnt == 0 ? '' :  '[' + board.replyCnt + ']'}"></span>
				</td>
				<td>
					<th:blcok th:if="${board.isPrivate=='Y'}">
						<a th:href="@{/board/checkPw(boardNum=${board.boardNum})}">
							<span th:text="${board.boardTitle}"></span>
						</a>
					</th:blcok>
					<th:blcok th:if="${board.isPrivate=='N'}">
						<a th:href="@{/board/boardDetail(boardNum=${board.boardNum})}">
							<span th:text="${board.boardTitle}"></span>
						</a>
					</th:blcok>
				</td>
				<td>[[${board.boardWriter}]]</td>
				<td>[[${board.regDate}]]</td>
				<td>[[${board.readCnt}]]</td>
			</tr>
		</th:block>
	</tbody>
	</table>
이후 board_list.html의 <tbody> 안의 태그로 게시글이 등록 됬을 때와 등록되지 않았을때
타임리프 구문의 <th:block th:if =" "> , <th:block th:unless=" ">를 사용하여 나타내주었다.
현재 게시글을 올리지 않았으므로 등록된 게시글이 없습니다. 가 출력될 것이다.

		<div style="text-align: center; margin-top: 20px; margin-bottom: 20px">
			<!-- <span th:if="${pageVO.prev}" th:text="이전"></span> 일케 써도댐.-->
			<th:block th:if="${pageVO.prev}">
				<a th:href="@{/board/list(nowPage=${pageVO.beginPage - 1})}">이전 </a>
			</th:block>
			<th:block th:each="pageNum : ${#numbers.sequence(pageVO.beginPage, pageVO.endPage)}">
				<a th:href="@{/board/list(nowPage=${pageNum})}"><span th:text="${pageNum}"> </span></a>
			</th:block>
			<th:block th:if="${pageVO.next}">
				<a th:href="@{/board/list(nowPage=${pageVO.endPage + 1})}">다음 </a>
			</th:block>
		</div>
		<input type="button" value="글쓰기" th:onclick="|location.href='@{/board/regBoard}';|">
	</div>
</div>
</th:block>
이후 페이지 처리와 글쓰기 버튼을 생성해 게시글 등록을 하러갈 수 있다.
Spring을 활용해서 보드게시판 만들어보기 (1) 회원가입

먼저 header의 JOIN 버튼을 눌러 회원가입을 해보러 가보자.
header.html

header.html에서 JOIN을 눌러서 join.html파일로 이동할 수 있다.


fragment로 생성한 html이기 때문에 <th:block layout:fragment="content"> </th:block> 으로 감싸져있는 곳이 출력된다.
tymeleaf 에서는 form태그를 이용할때 action앞에 th:를 추가로 붙여주며, 이때 "@{ / ~~ / ~~}" 와 같은 형태로 보낸다.
그리고 th:object를 사용하여 th:field에 해당 memberVO의 변수 값들을 불러줄 수 있으며,
이때 id와 name, value 값들을 불러와 저장시킬 수 있다.
MemberVO는 위의 오른쪽과 같이 4개의 변수가 저장되어 있다.
아이디와 비밀번호, 이름을 입력한 후 form 액션을 통해 컨트롤러로 이동하게 된다.


위와 같이 MemberController로 이동하여 @(어노테이션)Controller와 @RequestMapping을 사용하여 경로를 지정해준다.
이후 회원가입 기능을 만들어야 하는데, 위 html에서 method를 post로 주었기 때문에, @PostMapping을 사용하여 경로를 지정해줄 수 있다. 이후 메소드를 지정하고, 매개변수로 MemberVO 객체를 사용했다.
오른쪽 사진에 보이는 memberService는 아직 구현되지 않았다. mapper부터 만들러 가보자.

위에 보이는 resultMap은 select 일때만 사용해도 무방하므로 회원 등록하는 insert 구문에서는 필요가 없다.
따라서 위와 같이 쿼리를 작성해주고 Service interface로 넘어가면 된다.
SPRING_BOARD_MEMBER 테이블에는 join할때 입력할 값 3개를 자바에서 넘겨주면 된다.
MemberService 인터페이스

매개변수 및 리턴 타입 결정 방법(우선적으로 실행 시 쿼리를 작성)
매개변수 : 쿼리 실행 시 빈 값을 채울 용도
1. 쿼리에서 채워 줄 값이 없을 경우 : 매개변수 없음
2. 채워줄 값이 하나일 경우
2-1) 채워줄 값이 숫자인 경우 : 매개변수 int형 하나
2-2) 채워줄 값이 문자인 경우 : 매개변수 String형 하나
3. 채워줄 값이 여러개인 경우 : 매개변수는 DTO 객체.
리턴타입 : 쿼리 실행 결과를 어떻게 받아올지에 대한 정의
INSERT, UPDATE, DELETE 쿼리 실행 결과는
리턴타입을 int 혹은 void 사용하면됨. int로 받을 땐 return 필요o void는 필요x
SELECT 쿼리 결과의 리턴타입은 크게 두 가지로 나뉨.
조회결과 데이터가 무조건 한줄만 조회 : DTO 객체.
조회 결과 데이터가 0줄이상 가변적일 경우 : List<DTO> 객체.
MemberServiceImpl 클래스

MemberController 컨트롤러


컨트롤러로 가서 ServiceImpl 클래스에서 선언한 memberServic를 정의해주기 위해 컨트롤러에서
어노테이션 @Resource(name = "memberService") 로 받아줬고, Service 기능을 컨트롤러에서 사용할 수 있게 불러왔다.
이후 회원가입 기능을 완성할 수 있게 해당 컨트롤러로 넘어와 memberService에서 join 쿼리를 넣어주면 완성된다.
이후 다시 return "redirect:/member/login"; 로 보냄으로써

등록 버튼을 누르면 Member 컨트롤러로 넘어가 쿼리작업 까지 모두 마친 후 아래 login 페이지로 이동한다.


데이터베이스에 입력한 값이 잘 들어와 있는 것을 확인할 수 있다.
로그인 페이지에 대해서는 다음 장에서 이어서 할거다.
'✨ Back-end > Spring-Boot' 카테고리의 다른 글
| [Spring] 보드게시판 만들기(3) 글쓰기 (0) | 2023.03.23 |
|---|---|
| [Spring] 보드게시판 만들기(2) 로그인 Session (0) | 2023.03.22 |
| [Spring] 보드게시판 만들기(0) - 초기 세팅과 Fragment (0) | 2023.03.21 |
| [Spring] Ajax(비동기 통신) 사용해보기 (0) | 2023.03.21 |
| [Spring] CSS 및 JS 적용시키는 방법 fragment (0) | 2023.03.17 |


댓글